AutoCAD Civil 3D student
 As I’m sure most of my readers are aware, with the 2013 release, the ability to import images from Google Earth was not included. The fine folks at Autodesk have been working on getting us a replacement and this is it (at least for imaging). When you are in a drawing that is georeferenced (the tutorial file “Intro-1.dwg” works if you want to test it out) all you have to do is turn on the image.
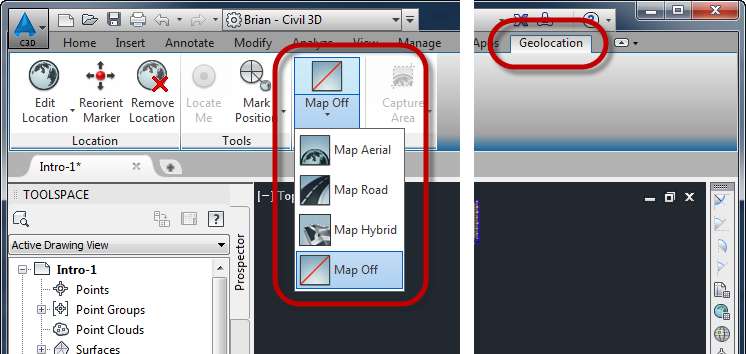
In the drawing (with the assigned coordinate system), simply go to the Geolocation tab on the ribbon and choose the Online Map type you want.
 You’ll need to log in to your Autodesk account (if you don’t have one, they’re free) and agree to the terms, etc. etc. Once you’ve done this, your image just shows up (provided you have a decent internet connection). Nothing too new here, we’ve been able to do this for a while (see my other posts ).
So, what’s new in 2015, THEY PLOT!
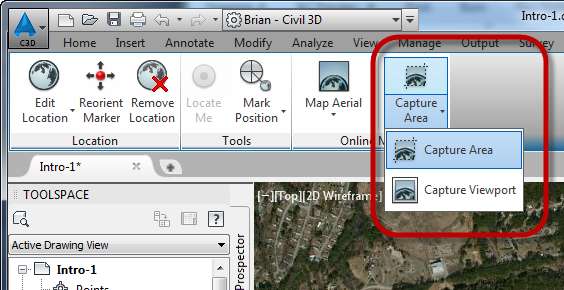
Ok, so there’s another step you have to take before they’ll plot but it’s not difficult, you have to capture an area. Once the imagery has been displayed in your drawing, go back to the Geolocation tab and choose “Capture Area”.
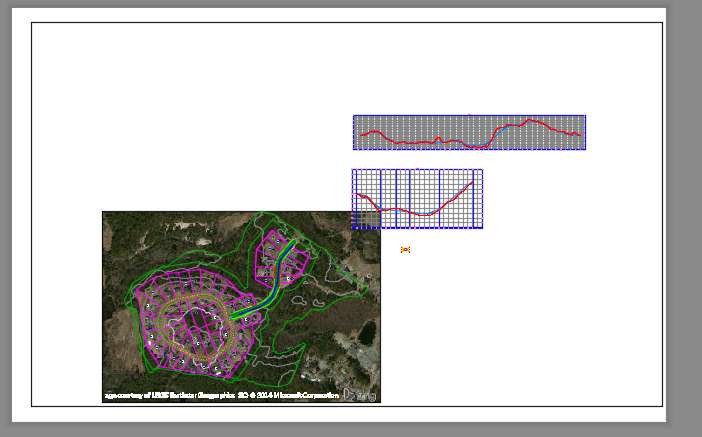 After you have captured the area, a new object type will be created, a GEOMAPIMAGE or “Map Image” as it’s displayed on the ribbon when selected. This object will plot as you can see in this plot preview:
Another really cool thing about the GEOMAPIMAGE is, if you edit the image extents, the image will update. Simply select the image frame, adjust a grip, and the image updates. Additionally, if you need a better resolution or less resolution, when you select the image, you’ll have those options on the Ribbon.
You might also like